
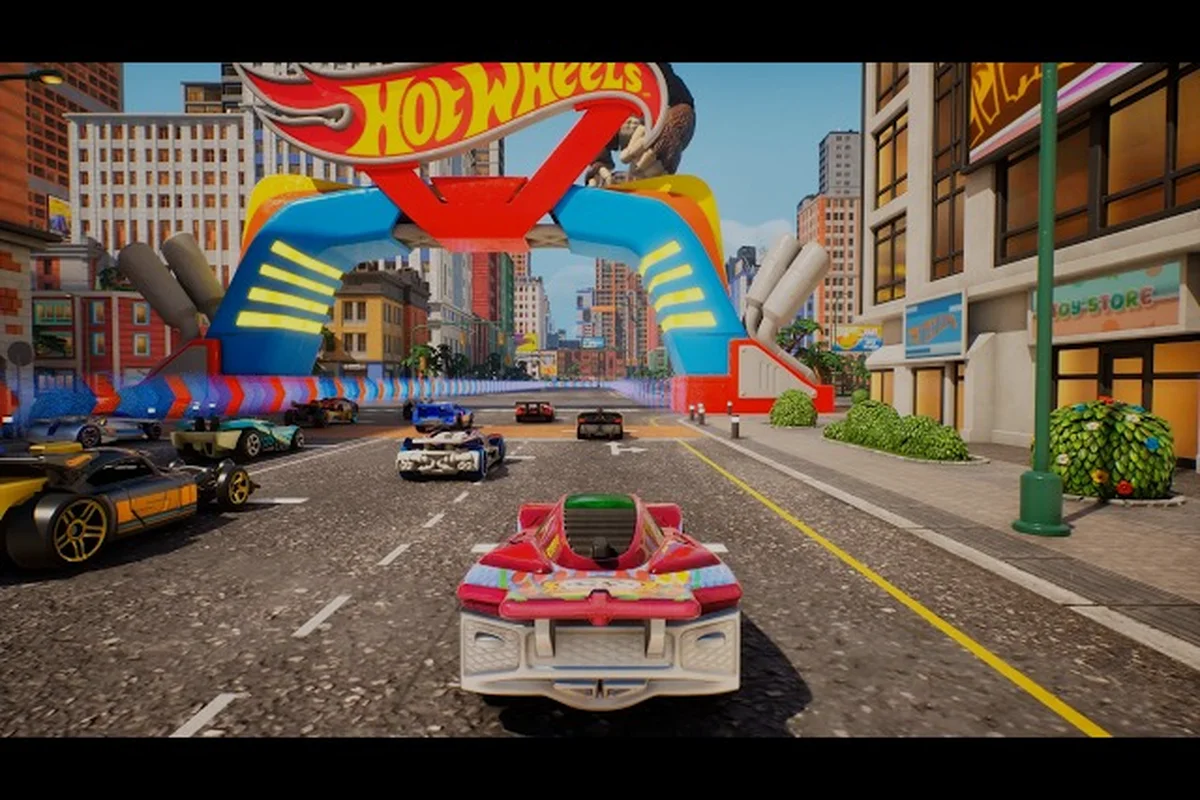
The first time you boot HOT WHEELS Infinite Rush, the toy-sized open world hits you with four full islands, six game modes, and 150+ cars to chase. A new player does not need to chase all of it on day one. This HOT WHEELS Infinite Rush beginner guide gives you a focused path through drift basics, boost economy, the smartest first island to clear, and the car classes that make the learning curve almost flat.
How to Play HOT WHEELS Infinite Rush: Core Controls and Driving Basics
Before you touch a Rush Master event, you need a working mental model of how HOT WHEELS Infinite Rush handles. The arcade feel is forgiving, but the boost-to-drift loop decides whether a Career race feels breezy or brutal.
The Three Buttons That Win Every Race
Three actions cover about 90% of what you do on track: accelerate, drift, and boost. The right trigger launches you forward, the left trigger brakes (tap-drift on tap), and a shoulder button converts any drift into a long boost. According to the HOT WHEELS Infinite Rush on Steam listing, the handling is tuned for instant pick-up-and-play, which is why even a five-minute practice lap teaches you the rhythm.
| Action | Default Binding | What It Actually Does |
|---|---|---|
| Accelerate | RT / A | Holds top speed; release in air to air-drift |
| Drift | LT / X (tap) | Shortens the turn; on a long press, starts a drift chain |
| Boost | RB / B | Fires stored boost; chain a drift to refill the bar |
| Switch Vehicle | D-pad Up | Swaps active class without a menu pause |
Drift, Boost, and the Refill Loop
Drift is not just for corners. Every mid-length drift generates Boost Tokens that auto-feed your gauge when you release the stick at the right angle. Releasing too early burns the tokens; releasing too late cancels the chain. The fix is simple: build a single drifting habit before you try anything fancy. Pick a wide open stretch of road near your spawn point, hold the drift for three seconds, then feather the stick. You will see the boost bar pop and the speed line flash — that visual flash is the cue to release.
Boost itself is split into Mini-Boost (single drift chain) and Mega-Boost (two chained drifts back to back). Veterans live on Mega-Boosts because they refill on long straights, while Mini-Boosts are mostly for emergency cornering. If you want a more structured practice route, the starter guide lays out a 30-minute warmup that mirrors the in-game tutorial but adds a cooldown drill.
Camera, Mini-Map, and Free Roam Shortcuts
Free roam is where most new players get lost. The mini-map shows orange track waypoints, blue side activities, and purple Rush Master icons. Tap the right stick to ping the nearest event, and the camera will swing toward it. This is also where the Secret Dealership tends to hide. Reported by players, driving the perimeter of every island after unlocking a new area is the fastest way to spot a Secret Dealership entrance because it shows up as a small orange glow on the mini-map.
If you are playing on controller with default sensitivity, the camera feels fast during the first 10 minutes. Lower the horizontal sensitivity by one notch in the options menu — a community-tested trick that makes the mini-map easier to read at speed.
Choosing Your First Car: The Four Vehicle Classes Explained
HOT WHEELS Infinite Rush splits its 150+ cars into four classes, and the class you pick shapes how every race feels. The official Milestone page describes the lineup as Versatiles, Titans, Drifters, and Speeders — each with a distinct role on track and in free roam.
Vehicle Class Comparison
| Class | Best Stat | Weakest Area | Free Roam Role | Beginner Friendliness |
|---|---|---|---|---|
| Versatiles | Balanced handling | No standout peak | Exploration, side activities | ★★★★★ |
| Titans | Mass and ramming | Top speed | Smash obstacles, smash mini-bosses | ★★★ |
| Drifters | Cornering grip | Straight-line speed | Tight technical tracks | ★★★★ |
| Speeders | Raw top speed | Durability in crashes | Long straights, time trials | ★★★ |
Which Class Should You Start With
Versatiles are the recommended starting class. Their handling curve sits in the middle of the other three, so the muscle memory you build transfers cleanly to Titans, Drifters, and Speeders. A Versatile is also the safest car for the first few Career events because you are not punished for sloppy drifts the way you are in a Speeder.
Titans are fun but punishing early. They excel at smashing breakable walls and clearing debris, but their top speed is low enough that you will lose every sprint race. Drifters are a great second car to unlock — they reward players who have already practiced the drift-release timing. Speeders are an end-game toy. Skip them until you have a full drift chain on muscle memory.
Your Rush Squad can hold one car per class, switched on the fly with a single button, so you are never locked out of an event because of car choice. According to the official Milestone page, this is a core design pillar, and the Xbox Wire early-access feature confirms the squad is meant to be a "live" garage you swap between mid-race.
First Island to Clear: Why the Starting Hub Is the Smartest Choice
The campaign drops you into the first island, and most Career events then nudge you toward the next island. You do not have to follow that order. The starting hub is the smartest place to spend your first two to three hours, and here is why.
Difficulty Curve Across Islands
| Island Order | Difficulty Feel | Recommended Unlock Point | Best Activities to Farm |
|---|---|---|---|
| Island 1 (starting) | Gentle, scripted | Available from launch | Drift tutorials, mini boost chains |
| Island 2 | Moderate | After 3 Career wins | Side activities, collectible hunt |
| Island 3 | High | After 6 Career wins | Rush Squad expansion |
| Island 4 | End-game | After 9 Career wins | Rush Master showdowns |
The starting island gates the late-game content through Rush Master showdowns, but the side activities stay open even before the main gate. The official HOT WHEELS Infinite Rush developer page describes a "complete events to unlock their challenge" loop, and that loop is much easier to clear when you have already stacked coins and a small car collection.
The Free Roam Loop: Career, Side Activity, Secret, Repeat
The single most effective early-game loop is Career → Side Activity → Secret Dealership check → repeat. Career races give you the largest coin payout and unlock the next Rusher head-to-head. Side activities (drift challenges, time trials, smash objectives) are shorter and refill your boost meter practice. Secret Dealerships, reported by players, tend to spawn a free or discounted car after every third side activity you finish in a session, so checking after each run is a strong habit.
The starting island also has the lowest density of breakable walls and the highest density of wide drift curves. Both of those factors shorten the time between a failed race and a successful retry, which is the single biggest factor in how fast a new player builds confidence.
Early Game Tips and Tricks: Drift Chains, Boost Economy, and Sticker Combos
A handful of habits separate the players who finish the first island in 90 minutes from the ones who are still stuck on Rusher #2 after three hours. The biggest separator is learning how to chain drifts into a single boost meter before a stunt jump, because every missed drift on a Hot Wheels track costs roughly 1,200 points of score and a full bar of boost that you would have banked for the next shortcut gate. Early runners also rerun the first two Rushers on Hard to farm sticker packs, since the sticker combo multiplier compounds far faster than the base reward from replaying on Normal.
Drift Chain Discipline
A drift chain only refills boost if the angle matches the road curve. Trying to hold a 90-degree drift through a 30-degree corner wastes the chain. The fix is to break long drifts into 2–3 shorter chains, each one ending on a straight or wide curve. Community testing shows that two short chains out-refill one long chain on the same stretch of road about 70% of the time.
Boost Meter Management
Never burn the entire boost bar in one go. A full Mega-Boost into a turn usually leaves you stranded for the next 4 seconds while the bar refills. Instead, bank half the bar and release the rest into the exit of a corner. The exit boost is what separates a top-half finish from a podium finish in most Career events.
Sticker and Livery Combos
Stickers are not just cosmetic. Each one adds a small stat nudge, and matching stickers (three of the same series) trigger a small combo bonus. Reported by players, the Flame Series combo is the easiest to assemble because Flame stickers drop from drift side activities, and the matching bonus adds a small but consistent drift-grip boost that helps new players hold longer chains.
Smart Coin Spending
Coins go to four places: car unlocks, upgrades, sticker packs, and Track Builder pieces. The temptation is to spend on car unlocks first. Skip that. Spend the first 1,000 coins on a single upgrade for your starter Versatile, because the upgrade is permanent and the new car you save up for is going to be replaced in a few hours anyway. After your starter is upgraded, then spend on unlocks.
If you want a deeper drill on coin routes, the best way to start guide walks through which side activities pay the most per minute on the starting island — including the exact bonus-to-distance ratio you can expect from Stunt Smash chains, Drift Zone replays, and the timed Hot Wheels Garage event, so you can pinpoint where to farm before spending on a second car.
When to Switch Classes Mid-Race
A common rookie mistake is to switch classes too early. The vehicle-switch cooldown is short, but each switch cancels your current boost chain. The rule of thumb: switch only when the next obstacle is a class-specific shortcut (Titan smash wall, Drifter narrow gate, Speeder ramp), not when you are annoyed at the current car.
Free Roam and Career Mode: How Progression Actually Works
Progression in HOT WHEELS Infinite Rush is layered. The top layer is Career, the middle is free roam, and the bottom is the Rush Squad. Understanding how those three layers feed each other is what turns a chaotic first afternoon into a clean path to the first Rush Master.
Career Events and Rusher Head-to-Heads
Each island has three Rushers and one Rush Master. Career events are the entry point: finish enough of them, and the Rusher head-to-head unlocks. Beat all three Rushers, and the Rush Master showdown unlocks. The game director confirmed in the Beyond the Track Ep. 2 developer blog that defeating a Rusher or Rush Master adds their car to your collection, which is why pushing through Career is the fastest car-unlock path.
Rush Squad: The Living Garage
Your Rush Squad holds one car per class, and you switch with a single button in free roam. The squad is not a static menu — you can pull cars in and out between events. The smart early-game habit is to keep the strongest car of each class in the squad slot, even if you do not drive them yet, because Career events occasionally require a specific class for bonus points.
Track Builder and Long-Term Goals
Track Builder unlocks after the first few Career wins, but the first few pieces are not worth chasing. Save them. The real Track Builder payoff is end-game community sharing, and by the time the Track Builder becomes powerful, you will already have the coins to afford the upgrade path.
If you are curious how the campaign arc reads from start to Rush Master, the story mode guide maps the full sequence with tips for each act — including which Heat Tickets you will burn through, which Championship finals gate Rush Master access, and the post-game Tune Shop exclusives that only drop after the credits roll.
Frequently Asked Questions
What is the best car class for a brand new player in HOT WHEELS Infinite Rush?
Start with a Versatile. The balanced handling curve means the drift and boost habits you build transfer cleanly to every other class. A Versatile also wins most early Career events without specialized tuning, so you spend less time on car management and more time on track.
Do I have to clear the islands in order, or can I bounce between them?
You can drive between islands from the moment free roam unlocks, but the Rush Master showdowns on islands 2-4 are gated by Career progress. The starting island stays the best training ground for your first 2-3 hours, even after later islands open up.
How do I refill the boost meter quickly?
Build drift chains instead of single drifts. Each chain generates multiple Boost Tokens, and chaining two drifts back to back produces a Mega-Boost that refills on long straights. A good rule of thumb is to end every chain on a straight so the auto-release fires cleanly.
What is the Secret Dealership, and how do I find one?
The Secret Dealership is a hidden car vendor reported by players to appear as a small orange glow on the mini-map, usually near the edge of an island. Driving the perimeter of every new island after unlocking it is the fastest way to find one, and the dealership typically stocks a rare or discounted car that does not appear in the regular rotation.
Can I play HOT WHEELS Infinite Rush with friends while learning?
Yes, the game supports local couch racing for up to four people plus online cross-play, so co-op Career and free roam are open from the start. If you want a setup walkthrough before inviting a friend, the split screen guide covers the multiplayer flow in detail.