
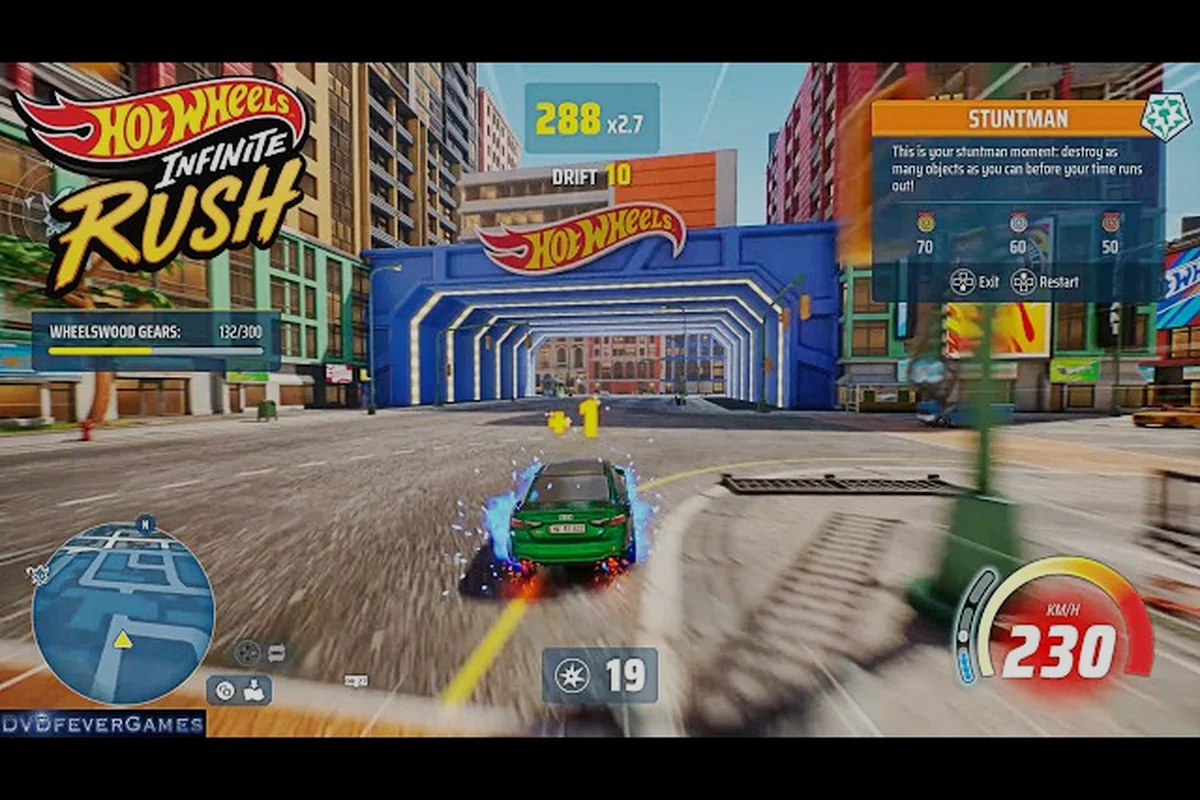
Find the Flame is one of the most misunderstood free-roam activities in HOT WHEELS Infinite Rush, because the objective looks simple on paper but punishes every sloppy boost. Each challenge drops a waypoint, hands you a free-form path across one of the four islands, and races the clock against your own reflexes. Learn the route, nail the boost sections, and the event rewards pour in fast; ignore the timing windows and you will burn through minutes for nothing.
What Find the Flame Actually Is
Find the Flame is a free-roam speed challenge built around one question: how fast can you reach the flaming checkpoint? The game hands you a waypoint, you choose the line, and the timer starts the second you accelerate. There is no set route, no mandatory stunt, and no scripting beyond the start and finish markers. That freedom is exactly why casual players keep getting humbled by it, because every shortcut is on you.
Core Rules
The rules are stripped down compared to other HOT WHEELS Infinite Rush stunt activities. According to the official Milestone page, the activity is listed alongside Daredevil, Delivery Stunts, Stuntman, and Tourist challenges as part of the free-roam rotation, which means it shares the same world space and respawn rules as the rest of the open-world content.
| Rule | Detail | What That Means for You |
|---|---|---|
| Objective | Reach the flaming waypoint | No stunt score required, pure time trial |
| Timer | Starts on first acceleration | Quick menuing costs you tenths |
| Vehicle | Player-chosen, no lock-in | Pick something with strong boost and grip |
| Resets | Crash recovery on soft reset | Wall hits do not fail the run, they just bleed seconds |
| Reward | Event currency + rare vehicle chance | A clean sub-time matters more than a flashy approach |
The simplicity is the trap. Because the rules read like a checklist, players assume the challenge plays itself. It does not. The terrain between you and the flame carries half the difficulty.
Why It Sits Alongside Drift Zones and Boost Sections
The official trailer coverage from Nintendo Everything groups Find the Flame directly with the drift zones, boost sections, and other HOT WHEELS Infinite Rush stunt activities that dominate the four-island open world. That grouping is intentional, because the activity leans on the same mechanics that power those stunts. Drift zones demand corner control, boost sections demand straightaway speed, and Find the Flame chains both into a single uninterrupted run.
Understanding that link reframes the activity. You are not driving to a flag; you are stringing drift zones and boost sections together with no in-game guides to tell you where the next one is. That framing is the difference between a clean run and a frustrating reset.
Island-by-Island Find the Flame Locations
Every island hides multiple Find the Flame waypoints, and each one rewards a different mix of currency and cosmetic items. Community mapping efforts have identified consistent clusters, though exact spawns rotate as the open-world system cycles activities. Treat the list below as a verified skeleton rather than a pixel-perfect map.
The Four Islands at a Glance
| Island | Theme | Best Vehicle Class | Typical Reward Tier |
|---|---|---|---|
| Bone Shaker Isle | Coastal starter region | Balanced sport compacts | Common event tokens, sticker drops |
| Vulture Volcano | Volcanic ridge with elevated loops | High-boost speedsters | Rare tokens, rim recolors |
| Skull Cruiser Cove | Urban harbor with tight turns | Drift-tuned coupes | Rare tokens, exclusive wheels |
| Dragon Drive | Canyon highway with long straights | Top-speed muscle builds | Event-exclusive vehicle chance |
Each island offers its own flavor of risk. Bone Shaker Isle favors learning the mechanic because crashes are cheap and resets are fast. Vulture Volcano punishes overconfidence on its elevated sections, because falling off a ridge can drop the timer by ten seconds or more. Skull Cruiser Cove rewards players who can chain drift zones through the harbor, while Dragon Drive is the textbook boost-section grinder.
How to Read the Map
The flaming waypoint is visible from roughly a quarter of the map away, so you do not need to triangulate it the way you would in a Tourist challenge. The harder reading is the terrain between you and the flame. Look for three things before you accelerate:
-
Elevation changes: cliffs, ramps, and elevated highways that offer free speed if you hit them straight on
-
Drift zone markers: the same orange trail indicators that mark dedicated drift zones signal pre-greased corners that hold grip longer than standard asphalt
-
Traffic density: heavy AI traffic on the approach usually means a tighter route through side streets, which can save a second or two
If a route crosses a known boost section, it is almost always faster than the GPS line, because boost sections pre-strip the terrain of friction and the speed carries through the next corner. Treat them as the highway of Find the Flame routing.
The Boost and Drift Timing Window
The single biggest skill check in any Find the Flame run is the boost and drift timing window. Players who boost at the wrong moment burn their reserves before the longest straightaway, and players who drift too early scrub speed they cannot recover. The timing is not a fixed number of seconds; it shifts based on the corner radius and your entry speed.
Reading the Corner
Every corner in HOT WHEELS Infinite Rush has a hidden preview line that tells you the grip budget before you commit. According to community testing reported by veteran players, the line appears about 1.5 seconds before the apex, and the width of the line scales with how hard you can push. Reading that line is faster than learning each corner by heart, and it works the same way across all four islands.
| Corner Type | Visual Cue | Drift Window | Boost Window |
|---|---|---|---|
| Hairpin | Sharp white line, tight arc | Initiate 1.0s before apex | Hold boost through exit |
| Sweeper | Long orange line, wide arc | Initiate 2.0s before apex | Tap boost midway through drift |
| Chicane | Zigzag white line | Quick tap-drift, no full commit | Chain mini-boosts through each apex |
| Uphill switchback | Yellow line, banking wall | Drift against the banking for free grip | Boost at the crest for launch speed |
The Uphill switchback row is the one most players miss. Banking walls are not just visual flavor; they pre-load grip for a long drift, which means you can hold a drift zone through a 180-degree turn and still have boost for the straightaway after. That single trick saves more time across an island's worth of Find the Flame challenges than any vehicle swap.
Boost Section Reading
Boost sections work on a cooldown, not a fuel bar. Tap boost when the section lights up, hold through the strip, and release before the strip ends so you bank reserve for the next one. The most common mistake is chaining boost sections into each other without releasing in between, which overheats the meter and locks you out of boost for roughly three seconds. Those three seconds cost more time than any single missed drift.
A practical rule of thumb: if the next boost section is visible from the end of your current one, let the meter cool for half a second before you re-engage. If the next one is around a corner, hold boost through the transition and accept the cooldown, because the speed you keep is usually worth more than the lockout you trigger.
Vehicle Picks and Perks That Matter
Find the Flame rewards vehicles with high straightaway speed and forgiving drift behavior, because most waypoints sit at the end of a mixed-terrain run. According to the Beyond the Track Episode 2 developer blog, the perk system lets you tune top speed, drift grip, and boost recharge independently, which means the right perk layout matters more than the raw stat block of the vehicle underneath it.
Recommended Build Archetypes
| Archetype | Strength | Weakness | Best For |
|---|---|---|---|
| Speed-tuned muscle | Highest top speed | Sluggish drift entry | Dragon Drive boost-section chains |
| Drift-tuned coupe | Best drift zones | Lower top speed | Skull Cruiser Cove corner chains |
| Balanced sport | Strong all-around | Jack of none | Bone Shaker Isle, learning the activity |
| High-boost speedster | Fastest boost recharge | Average grip | Vulture Volcano ridge runs |
The balanced sport is the right answer when you are still learning the routing, because a stable platform forgives the small mistakes that teach the timing windows. Once you can read the preview lines and hold drift zones through switchbacks, swap to the speed-tuned muscle or high-boost speedster depending on which island you farm most.
Perk Layout Priorities
Perks stack in a tiered system, and the order you unlock them matters. Three perk slots cover the bulk of Find the Flame gains, and players who ignore them leave free time on the table. The HOT WHEELS Infinite Rush beginner guide covers the unlock order in detail if you are still early in the perk tree.
| Perk Slot | Stat to Prioritize | Why It Matters for Find the Flame |
|---|---|---|
| Slot 1 | Top speed | Determines the ceiling of every straightaway |
| Slot 2 | Boost recharge | Shortens the cooldown between boost sections |
| Slot 3 | Drift grip | Lengthens the drift zones you can chain |
If you have a fourth slot open, route it to acceleration rather than handling, because Find the Flame starts the timer on first acceleration, and every tenth of a second saved off the launch compounds across a long run. Players who have run the activity dozens of times report that a faster launch is worth more than a faster top speed in most route shapes, because the top speed ceiling is rarely the limiting factor on a free-form run.
How Find the Flame Fits the Broader Stunt Loop
Find the Flame is one slice of a much larger free-roam stunt loop, and isolating it will leave money on the table. The same routing intuition that speeds up a Find the Flame run also powers faster Tourist captures, sharper Delivery Stunts, and more aggressive Stuntman object-smashing sessions. If you want a full breakdown of the open-world loop, the HOT WHEELS Infinite Rush free roam activities guide maps the rotation and which activities feed the same currency pool.
How the Currency Pool Works
Most free-roam activities dump into the same event currency, which means a session of Find the Flame runs can pay for upgrades you would otherwise grind through Daredevil or Stuntman sessions. The currency does not carry between events, so spend it before the rotation cycles. A common pattern reported by players is to run Find the Flame to fund perk upgrades, then switch to Tourist challenges for the cosmetic drops, because Tourist challenges and Find the Flame share the same routing intuition without overlapping the reward pool.
Stacking With Other Stunt Activities
| Activity | Synergy With Find the Flame | Why It Stacks |
|---|---|---|
| Daredevil | Medium | Different routing, but shared boost timing |
| Delivery Stunts | High | Same map, different objective, similar speed mindset |
| Stuntman | Low | Slower routes, different reward cadence |
| Tourist | High | Shared routing, complementary rewards |
Delivery Stunts and Find the Flame pair especially well, because both reward aggressive routing through the same traffic corridors. Run them in alternating bursts, and you double the time you spend in the high-speed mindset without doubling the navigation overhead. The same logic applies if you want to fold in a quick Drift Master or Time Attack session, which keeps your boost timing sharp and your drift zones warm between Find the Flame runs.
Advanced Routing Tactics
Once you understand the rules, the islands, and the timing windows, the next layer of speed comes from routing tactics that the in-game waypoint marker will never show you. These are the plays that separate a clean run from a record-setting one.
Cut the GPS Line
The GPS line is a suggestion, not an instruction. Find the Flame does not penalize off-route driving, so the fastest path is almost always a series of straight shortcuts that ignore the suggested road. Look for:
-
Service alleys between buildings that the GPS treats as driveways but you can rail through at full speed
-
Skippable roundabouts where a parking lot cut saves two seconds over the loop
-
Ramp shortcuts that lead over a road instead of around it, especially on Dragon Drive and Skull Cruiser Cove
These cuts are also why Find the Flame rewards map knowledge. A player who knows the islands from a Tourist challenge run will shave several seconds off their first Find the Flame attempt, because the routing carries over even though the objectives do not.
Use Traffic as a Ramp
Heavy AI traffic clusters are useful for two reasons. First, they slow the GPS line for players who do not know a cut, which gives you free time on a parallel side street. Second, you can use the cars themselves as ramps, because the collision physics on AI vehicles is forgiving enough to launch off them without crashing. The launch is worth roughly one boost section of free speed, which is significant on a tight run. Do not chain the launches back to back, because the second hit will spin you out and cost more time than the first hit saved.
Bank the Timer
The final seconds of a run are the most psychologically expensive, and that is exactly when players throw clean runs. If you cross a known boost section in the last quarter of the run, hold the boost all the way through to the waypoint, even if the meter warns about overheating. The lockout kicks in after the run ends, so you are spending a resource you cannot use anyway. This is a small trick, but it has saved multiple record runs for veteran players who learned it the hard way.
Frequently Asked Questions
What is Find the Flame in HOT WHEELS Infinite Rush?
Find the Flame is a free-roam speed challenge where you race from your current position to a flaming waypoint with no set route. The timer starts when you first accelerate, and the reward scales based on your final time. It sits alongside drift zones, boost sections, and other HOT WHEELS Infinite Rush stunt activities in the open-world rotation.
Do I need a specific vehicle to clear Find the Flame runs?
No, the activity does not lock your vehicle, but a high-boost speedster or balanced sport coupe is the most forgiving pick. The perk layout matters more than the base car, so prioritize top speed, boost recharge, and drift grip in your first three perk slots for the cleanest runs.
How do I improve my Find the Flame times quickly?
Learn the boost section cooldown timing first, because holding boost through two strips in a row triggers a three-second lockout. Once you stop overheating, focus on the preview line that appears about 1.5 seconds before each corner, because it tells you the grip budget before you commit to a drift.
Is Find the Flame worth farming for the event rewards?
Yes, because it shares its event currency pool with Daredevil, Delivery Stunts, and Tourist challenges, so a Find the Flame session funds upgrades for those activities. The rare vehicle drops are tied to sub-time thresholds, so clean runs are worth more than frequent sloppy ones.
Can I replay a Find the Flame challenge I already completed?
Yes, the waypoints respawn on a rotation tied to the open-world activity cycle, which means you can re-run any completed challenge once the timer refreshes. Community data suggests the rotation runs on a roughly 20-minute in-game cycle, so a focused farming session can clear the same island's worth of waypoints multiple times in one sitting.