
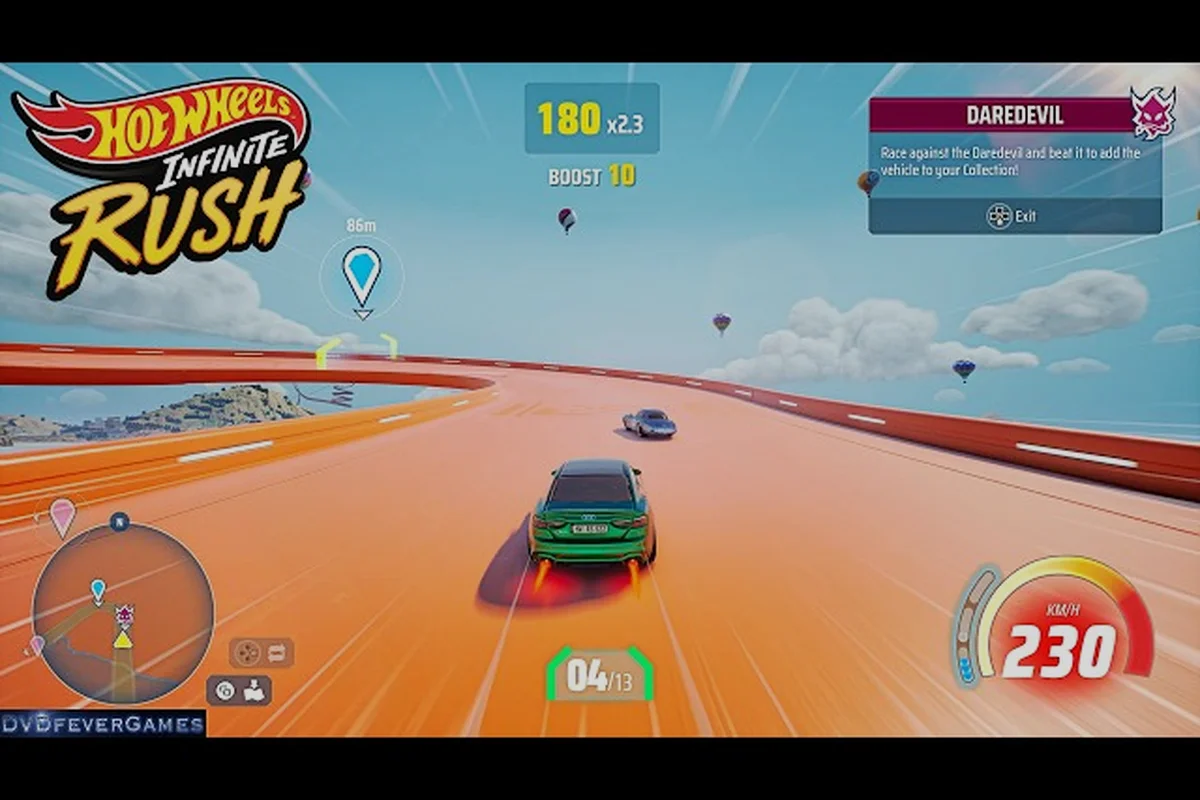
Every archipelago in HOT WHEELS Infinite Rush hides more than just shortcuts. The four islands are stuffed with bite-sized challenges that reward coins, perks, and rare vehicles, and the smartest players treat them as the real progression engine between ranked races. From daredevil duels in traffic to stuntman smashathons, this challenge guide walks through the full menu of HOT WHEELS Infinite Rush island activities so nothing slips past your Garage. Skip them and you'll spend hours grinding Quick Race; clear them methodically and you'll unlock a stacked roster plus a mountain of customization loot.
The Six Activity Types on Every Island
Before chasing individual icons, it helps to know the categories. According to the official Milestone product page, HOT WHEELS Infinite Rush ships with six core free-roam activity types, each tied to a specific gameplay loop. Recognizing them by their on-map color and icon saves time when you bounce between Wheelswood, Gearopolis, Carbon City, and the Drifty Temples archipelago.
| Activity Type | Primary Goal | Reward | Time Commitment |
|---|---|---|---|
| Daredevil | Beat a special traffic vehicle in a 1-on-1 race | That vehicle added to Garage | 60–90 seconds |
| Delivery Stunt | Drive a fragile car to a destination without wrecking | The delivery vehicle if successful | 2–4 minutes |
| Stuntman | Smash as many objects as possible within a time limit | Coins + perk XP | 60–120 seconds |
| Tourist | Photograph a specific target with framing requirements | Sticker packs + coins | 30–60 seconds |
| Find the Flame | Reach a checkpoint as fast as possible, no set route | Fastest vehicle in that class | 2–5 minutes |
| Stunt Activity | Drift zones, boost sections, and trick jumps | Coins scaled to combo score | 30–90 seconds |
Six types means a balanced loop: Daredevils pad your Garage, Stuntman and Tourist pay the bills, while Find the Flame and Delivery Stunt test how cleanly you can drive. Stacking them across islands is the fastest way to climb the Rush Squad ladder.
Daredevil Duels and How to Trigger Them
Daredevils are the marquee HOT WHEELS Infinite Rush events for collectors. They appear as special vehicles weaving through traffic, and the moment you get close, a marker pulses above their roof. The intro is simple: pull alongside, hold the position for roughly two seconds, and the head-to-head triggers automatically. Per the Beyond the Track Episode 3 devblog, beating the Daredevil unlocks that exact Hot Wheels model for your Garage, which is why these are the single highest-value encounter on the map.
Spotting Patterns by Island
Daredevils spawn on a rotation, but community data collected by the Milestone forums suggests each island has predictable hotspots. Wheelswood favors tight urban loops, while Drifty Temples tends to push them onto elevated shrine paths. The table below summarizes the most reliable hunting grounds.
| Island | Common Daredevil Zones | Traffic Density | Difficulty |
|---|---|---|---|
| Wheelswood | Downtown grid, boardwalk loop | Heavy | Easy |
| Gearopolis | Industrial conveyor belt, factory switchbacks | Medium | Medium |
| Carbon City | Highway interchange, neon tunnel | Heavy | Hard |
| Drifty Temples | Shrine staircase, sakura bridge | Light | Medium |
Three practical tips to win more duels: pre-load a tier-2 boost before the marker pulses, brake-drift through the first corner to keep traction, and save your strafe for the final straight. Daredevils are tuned slightly above the local AI, so a clean run is worth more than a wild one.
Stuntman: The Smash-First Grind
If Daredevils are precision work, Stuntman is pure catharsis. Every Stuntman hotspot drops you into a confined arena packed with destructible props, and the timer starts the second you cross the line. According to the Nintendo Everything coverage of the four-islands reveal, the goal is to break as many objects as possible, and the score scales with the rarity of the wreckage.
Stuntman Scoring Tiers
Community leaderboard data from tracked Stuntman runs shows the score-to-coin curve isn't linear — it actually jumps at three breakpoints where payouts roughly double. The 50-object Silver threshold pays about 3,000 coins per run, the 80-object Gold tier roughly 5,500, and crossing 110 objects unlocks the Flame tier's 8,000-coin ceiling, which makes those score plateaus the most efficient grind targets per minute spent on a single stunt session.
| Score Tier | Object Count | Coin Reward | Perk XP |
|---|---|---|---|
| Bronze | 30–49 | ~1,500 | 50 |
| Silver | 50–79 | ~3,000 | 120 |
| Gold | 80–109 | ~5,500 | 220 |
| Flame | 110+ | ~8,000 | 350 |
Hit Flame consistently and you can clear the perk tree in roughly a focused weekend, especially if you chain Stuntman with Drift Master sessions in between. For a deeper breakdown of which perks to prioritize first, the free roam activities overview maps the full progression curve.
Delivery Stunt, Tourist, and Find the Flame
These three island activities — Delivery Stunt, Tourist, and Find the Flame — close out the practical rotation by isolating the three failure states that most often wreck an otherwise clean waypoint run in Hot Wheels Infinite Rush. Miss a fragile handoff on Delivery Stunt, overshoot a turn on Tourist, or arrive seconds late to a Find the Flame daredevil waypoint, and you bleed stars that cascade into the rest of your stuntman scoring. Drilling them in the first five minutes of a session tightens your line, sharpens braking points, and makes the trickier daredevil events feel far more forgiving later.
Delivery Stunt Discipline
Delivery Stunts hand you a specific vehicle and a destination pin. Every collision racks up damage, and if the chassis cracks past a threshold, the run fails. The trick is to slow down at the first turn, memorize the route, and treat the throttle like an on-off switch. Heavy cars benefit from wide lines; lightweight chassis want a featherweight trail-brake approach. These runs reward consistency over flash, and the reward is the vehicle itself, which makes failed attempts sting more than a Stuntman miss.
Tourist Photography Rules
Tourist activities feed a photo mode prompt. You'll see a target icon with framing hints such as "low angle" or "include the orange cone." Hold the right stick to enter the camera, align the framing reticle with the on-screen silhouette, and snap the shot within the timer. Tourist challenges are the shortest activity in the game, so they make excellent warmups before tackling the heavier HOT WHEELS Infinite Rush events on your list.
Find the Flame and Waypoint Sprints
Find the Flame drops you with a destination but no checkpoints, so the route is your call. This is where the waypoints system becomes critical: skilled drivers clip boost rings, chain drift zones, and use the terrain to skip long straights. If you're hunting the fastest time, study the islands' elevation first, because vertical shortcuts often beat the obvious tarmac route by several seconds.
Waypoints, Drift Zones, and Stunt Activities
Waypoints are the connective tissue between everything else. The six race modes include a dedicated Waypoints mode, but the same logic applies to free-roam: each map is dotted with rings, ramps, and drift corridors. Collecting them in order unlocks bonus coins and fast-travel points, which is essential because the archipelago is huge.
Drift Zone Layouts per Island
Each island leans into a different stunt identity, so the Drift Zone meta shifts dramatically once you factor in elevation changes, surface traction, and corner radius. Community-tested routes in Carbon City, for example, reward Tuner-class builds that can hold a 45-degree slide through the neon tunnel slalom, while Gearopolis favors Muscle cars capable of absorbing the conveyor helix's lateral G-forces. The table below captures those favorites, with the x1.6 Lightweight ceiling at Drifty Temples set by the sakura switchback's three chained combo gates.
| Island | Signature Drift Zone | Best Vehicle Class | Score Multiplier |
|---|---|---|---|
| Wheelswood | Boardwalk S-bends | Sport | x1.2 |
| Gearopolis | Factory conveyor helix | Muscle | x1.4 |
| Carbon City | Neon tunnel slalom | Tuner | x1.5 |
| Drifty Temples | Cherry blossom switchback | Lightweight | x1.6 |
Drifty Temples consistently delivers the highest drift scores because of the long, sweeping sakura-lined bends, and a focused Drifty Temples exploration guide can shave hours off your grind. Pair those drifts with boost sections and trick jumps to stack combo multipliers, because the Stunt Activity payout scales with the chained score, not the individual hit count.
Waypoint Route Planning
Plan a loop rather than chasing icons randomly. Most islands can be circumnavigated in roughly four minutes if you chain the coastal road, the elevated highway, and the stunt district together. Use the in-game map filters to display only waypoints during a sweep, then swap to icons-only for HOT WHEELS Infinite Rush events. This rhythm keeps the grind moving without forcing you to backtrack.
Rewards, Garage Growth, and Coin Economy
Every activity in this challenge guide feeds two long-term goals: filling the Garage and stacking coins for the Creativity Corner. Coins unlock stickers, rims, wheels, and custom boost effects, while Garage slots are the real status symbol. Players who ignore free-roam spend twice as long in Quick Race to chase the same result.
Reward Yield by Activity
| Activity | Avg. Coin Yield | Garage Impact | Repeatability |
|---|---|---|---|
| Daredevil | 1,200 | +1 vehicle | Respawns every ~10 min |
| Stuntman | 3,000 (Gold) | None directly | Instant retry |
| Delivery Stunt | 2,000 | +1 vehicle on success | One-shot per day |
| Tourist | 800 | None | Instant retry |
| Find the Flame | 2,500 | Fastest vehicle unlocked | Daily leaderboard |
| Stunt Activity | 1,500 | None | Instant retry |
Stuntman is the most coin-efficient activity per minute, while Daredevil and Delivery Stunt are the only two that add vehicles to your collection. For a full breakdown of the fastest coin routes, the daredevil strategy piece pairs nicely with this challenge guide and helps you choose which to farm at any given session.
Building a Daily Routine
A balanced session looks like this: open with a Tourist challenge for the quick coin burst, push into one Stuntman hotspot for combo practice, then run a Daredevil or two before signing off. Throw a Find the Flame run in if you're chasing the leaderboard, and save Delivery Stunts for when you can focus without chat notifications. This rotation is roughly an hour, and it tends to outpace any single-activity grind by a wide margin.
Pro Tips for Efficient Island Sweeps
Sweeping islands efficiently is less about raw speed and more about route discipline. Players who consistently max out the waypoints system treat the map like a delivery route, not a sandbox. Pin a waypoint, take the most direct stunt-rich path, and only detour for icons you cross en route.
-
Pre-stage your vehicle before a Daredevil triggers, because the duel loads faster when your ride is already warm.
-
Use mini-map rings to predict boost sections, since they always align with a ramp or jump.
-
Save the strafe for the second half of Find the Flame runs to conserve the cooldown for the final push.
-
Stuntman priority props: large stacks and explosive barrels are worth more than small props, so aim the car before charging in.
-
Tourist framing benefits from a quick camera test before the timer starts, because misaligned shots cost the bonus entirely.
A common mistake is treating the islands as decoration. They are the campaign, and clearing them with intent is what separates a casual player from one who walks into ranked modes with a fully tuned Garage. Each island chains multiple activity types — Daredevil duels, Stuntman prop runs, Tourist photo contracts, and Find the Flame routes — so partial credit across two islands rarely unlocks the tuning parts locked behind full 3-star clears. Treat every island as a checklist: hit stuntman priority props first for score, then loop back through mini-map rings to convert unused boost into Daredevil wins, and only then burn the strafe on Tourist framing once you have spare cooldown. A player who 3-stars five islands will out-Gear someone who 5-stars ten by chasing icons at random, because the Garage unlocks are weighted, not cumulative.
Frequently Asked Questions
What are the main HOT WHEELS Infinite Rush island activities?
There are six core types: Daredevil duels, Delivery Stunts, Stuntman, Tourist photo challenges, Find the Flame sprints, and Stunt Activities. Each one rewards different combinations of coins, perks, and rare vehicles, and they're scattered across Wheelswood, Gearopolis, Carbon City, and the Drifty Temples archipelago.
How do I trigger a Daredevil encounter?
Drive close to a special vehicle roaming in traffic. A marker appears above the car, and holding the position for about two seconds initiates a 1-on-1 race. According to the devblog, beating a Daredevil adds that exact vehicle to your Garage, which is why they're the most valuable HOT WHEELS Infinite Rush events on the map.
Where are the best Stuntman hotspots?
Industrial zones and arena-style plazas tend to pack the most destructible objects per square meter. Gearopolis and Carbon City are the most consistent Stuntman maps, while Drifty Temples offers tighter arenas with higher Flame-tier ceilings when chained with a long boost entry.
Is there a difference between Stunt Activities and Stuntman?
Yes. Stunt Activities focus on drift zones, boost sections, and trick jumps, with rewards scaling by combo score. Stuntman is purely about smashing props within a timer. They complement each other, and the best sessions rotate between the two rather than farming only one.
How long does it take to clear all island activities?
A focused player can clear every visible icon on a single island in roughly 45–60 minutes, including Daredevil respawn cycles. Sweeping all four islands in one sitting takes about four hours, but a daily 30-minute habit clears the same content within a week and pads the Garage steadily.