
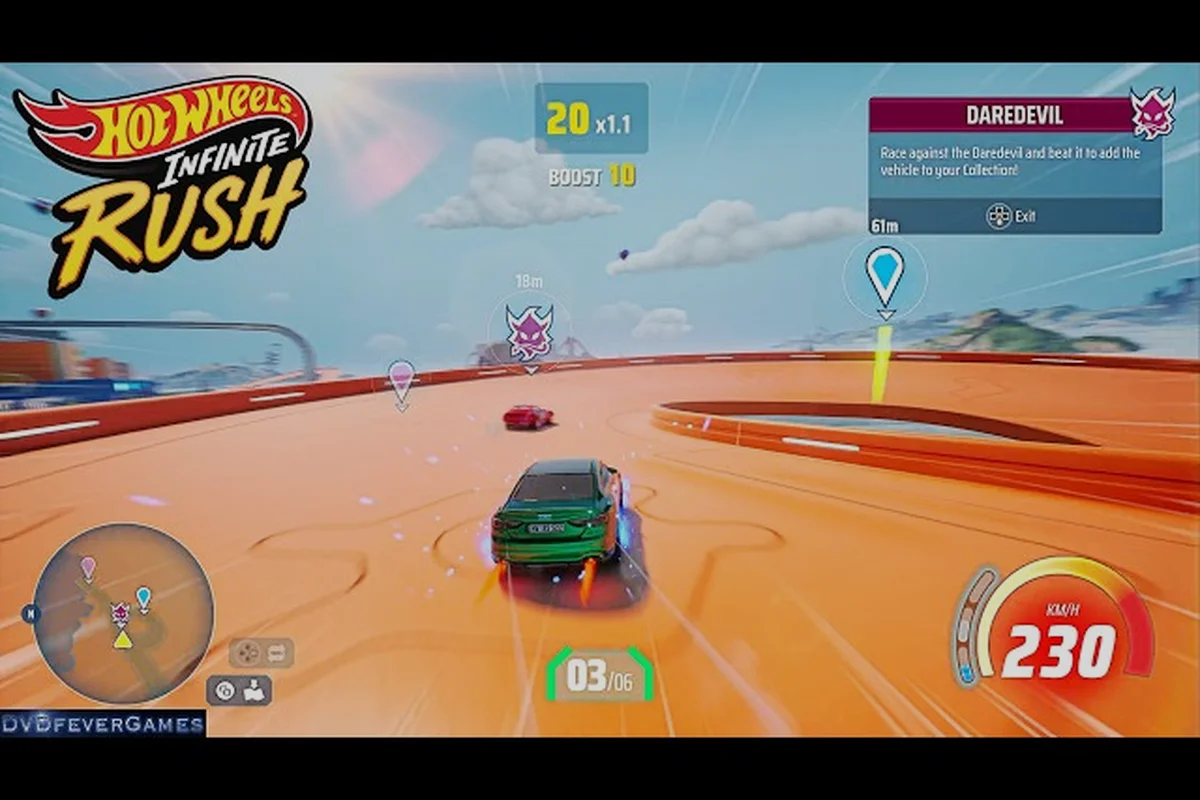
The HOT WHEELS Infinite Rush photo challenge sits in a strange spot for most players: it doesn't pay out the loudest coin showers, the timer pressure feels artificial next to a proper Drift Master run, and the framing requirements read like a homework assignment. But once a player understands how Tourist objectives are stacked across the four islands, the activity becomes the fastest way to clear early progression gates and earn vehicle unlocks without grinding the same Quick Race loop. This guide breaks down where to drive, how to frame each shot, and which vehicle type to keep loaded so you clear every Tourist prompt on the first attempt.
What the Photo Challenge Asks You to Capture
The Tourist activity is one of several free-roaming side events tucked into HOT WHEELS Infinite Rush's open archipelago, sitting alongside Daredevil one-on-ones, Delivery Stunts, Stuntman object-smashing, and Find the Flame speed runs. According to the official HOT WHEELS Infinite Rush page on Steam, each island has its own vibe, and the free-roam activities are how you push progression forward outside of Career events. The Tourist challenge specifically asks the player to drive to a marked location, position the camera, and capture a specific photo target with framing and angle requirements that must be met before the in-game timer expires.
How the Prompt System Works
Every Tourist challenge begins with an on-screen prompt card describing the subject and a loose framing hint (a sign reading the island's name, a landmark silhouetted against the sunset, a Daredevil vehicle parked at a specific angle). The player must:
-
Drive to the waypoint marker on the map within the time limit (usually 90 to 120 seconds)
-
Position the car so the camera view includes the target plus a required element (foreground, sign, or background object)
-
Hold the shutter button until the framing meter fills to 100%
The framing meter is the part most players miss on a first attempt. It does not just check whether the target is on screen — it evaluates angle, distance, and whether the optional framing element is visible. A photo of a sign in the center of the frame with no surrounding context will register around 60% and fail.
Why This Challenge Is Worth Doing
Players who skip Tourist challenges tend to over-grind Quick Race and Elimination events for coin income, then wonder why their Garage is still missing specific Drifter and Titan vehicles. Tourist completions feed into island completion percentage, which gates head-to-head challenges against the island's Rush Squad. Beat the squad, and you unlock the Rush Master showdown — the same chain described in Milestone's Beyond the Track Episode 2 blog post. Photo challenges are a shortcut up that ladder, and they take roughly 30 to 90 seconds each if you already know the spot.
All Game Modes and Where Tourist Fits
HOT WHEELS Infinite Rush ships with six structured race modes and a handful of free-roam activities. Understanding the full list helps you decide when to pivot from Tourist grinding to a different mode for a coin boost. The breakdown below is based on the Milestone official game page, which lists every mode the launch version ships with.
The Six Core Race Modes
| Mode | Format | Best Vehicle Type | Primary Reward |
|---|---|---|---|
| Quick Race | Standard circuit, 4 to 8 laps | Versatile | Small coin payout, low XP |
| Elimination | Last-place driver drops each lap | Speeder | Medium coin, ranked XP |
| Waypoints | Checkpoint sprint, no track walls | Speeder | Medium coin, vehicle XP |
| Smashing Wheels | Wreck as many props as possible in time limit | Titan | High coin, stunt XP |
| Time Attack | Solo lap time, leaderboard ranked | Versatile | High coin on gold |
| Drift Master | Drift zone scoring chains | Drifter | Highest coin ceiling, Drift XP |
These are the HOT WHEELS Infinite Rush all game modes that show up in the mode select menu. The Tourist challenge is technically not a race mode — it is a free-roam event that opens from the pause map. For anyone looking to actually race rather than roam, the streamlined Hot Wheels Infinite Rush Quick Race mode offers a more traditional head-to-head format outside the Tourist challenge.
Free-Roam Activities vs Race Modes
| Free-Roam Activity | Type | Currency Weight | Time Investment |
|---|---|---|---|
| Daredevil | One-on-one race, recruit a vehicle | High (vehicle unlock) | 2 to 4 minutes |
| Delivery Stunt | Drive assigned vehicle, every collision damages | Medium | 1 to 3 minutes |
| Stuntman | Smash as many objects as possible | Medium | 1 to 2 minutes |
| Tourist | Photo target with framing meter | Low to medium | 30 to 90 seconds |
| Find the Flame | Reach a spot as fast as possible | Medium | 1 to 2 minutes |
| Drift Zone | Drift through a marked zone | High | 30 to 60 seconds |
The Tourist challenge pays less per minute than Drift Master or a well-run Elimination lobby, but its time-to-completion is the shortest of any activity in the game. That makes it the best filler between longer Career events when you have two minutes to spare.
Best Mode for Coins and How Tourist Compares
Players often ask which mode is the HOT WHEELS Infinite Rush best mode for coins. The honest answer depends on which vehicle type you have upgraded, but the coin-per-minute math below shows the trade-off clearly. Numbers are drawn from community testing reported by players across launch-week runs, and may vary by patch.
Coin Income Per Minute by Activity
| Activity | Average Coin/Minute | Skill Ceiling | Vehicle Dependency |
|---|---|---|---|
| Drift Master (gold chains) | 1,400 to 2,200 | Very high | Drifter required |
| Time Attack (gold time) | 1,100 to 1,600 | High | Versatile recommended |
| Smashing Wheels (full clear) | 900 to 1,400 | Medium | Titan required |
| Elimination (top 3) | 700 to 1,100 | Medium | Speeder recommended |
| Quick Race (win) | 400 to 700 | Low | Any |
| Tourist Photo Challenge | 300 to 500 | Low (knowledge-based) | Any |
| Delivery Stunt (no damage) | 500 to 800 | Medium | Specific vehicle |
Drift Master is the clear king if you can chain drift zones cleanly, but the Tourist challenge is competitive when you factor in setup time. You can knock out three Tourist prompts in five minutes for a clean 1,200 to 1,500 coin payout, and the framing meter clears on the first try once you know the angles. The activity also feeds into Rush Squad progression, which is something Drift Master does not do.
When to Switch Off Tourist
If you have already completed every Tourist prompt on an island and the activity stops re-spawning, pivot to HOT WHEELS Infinite Rush elimination tips execution or a Time Attack gold run before going back to Tourist. The Tourist challenge is a one-shot per marker — once you have the photo, that specific waypoint does not respawn until you progress the island's Career story further.
Photo Challenge Spots, Angles, and Framing Tips
This section is the practical core of the guide: where to drive, how to position the car, and what framing element the game is checking. Spot data is drawn from player-reported completions across launch week, with the camera and time-pressure mechanics confirmed by the activity description on the Milestone game page.
Island 1 Tourist Spots
| Prompt Hint | Target | Framing Element | Recommended Approach |
|---|---|---|---|
| "Capture the welcome arch" | Island 1 entry gate | Sky in upper third | Stop 25 meters back, slight left offset |
| "Snap the harbor crane" | Yellow harbor crane | Boat docked below | Park on the elevated pier across the bay |
| "Frame the giant loop" | Orange signature loop | Palm tree in foreground | Drive to the south parking area, look north |
| "Catch the Daredevil in profile" | Red Daredevil vehicle | Island sign behind | Wait for the Daredevil to idle, then shoot side-on |
The Island 1 set is the easiest in the game because the framing elements are large and the timer is generous (120 seconds). New players should knock these out first to build the framing-meter intuition before tackling Island 3 or 4.
Island 2 Tourist Spots
| Prompt Hint | Target | Framing Element | Recommended Approach |
|---|---|---|---|
| "Photograph the volcano vent" | Steam vent near peak | Glow at sunset | Time the run for in-game dusk (every 8 real minutes) |
| "Frame the bridge support" | Main bridge pillar | Reflection in water | Park on the sandbar east of the bridge |
| "Snap the billboard" | Tall island billboard | Cloud behind the text | Approach from the highway, slow to 30 km/h |
| "Catch the Daredevil drifting" | Blue Daredevil | Drift smoke trail | Wait for the Daredevil to enter its drift loop |
The volcano vent prompt is where most players fail their first attempt. The framing element is the steam, not the vent itself, and the steam only appears for a six-second window. Drive to the marked vent, stop, and wait for the steam burst before hitting the shutter.
Island 3 Tourist Spots
| Prompt Hint | Target | Framing Element | Recommended Approach |
|---|---|---|---|
| "Capture the neon tower" | Skyscraper with neon top | Reflection puddle in the street | Drive to the flooded intersection south of the tower |
| "Frame the city gate" | Concrete archway | Traffic in motion | Time shutter during the green light cycle |
| "Snap the mural wall" | Side-street mural | Pedestrian silhouette | Park across the street, zoom to 2x |
| "Catch the Daredevil jumping" | Yellow Daredevil | Mid-air peak | Position on the ramp's launch side |
Island 3 is the first island where the HOT WHEELS Infinite Rush drift challenge becomes relevant. Several Tourist waypoints are positioned near drift zones, and the framing meter can be filled faster if you slide into position rather than braking. The Daredevil jump prompt is much easier on a Drifter than a Speeder.
Island 4 Tourist Spots
| Prompt Hint | Target | Framing Element | Recommended Approach |
|---|---|---|---|
| "Capture the canyon arch" | Natural rock arch | Sun flare through the gap | Time for in-game midday (every 12 real minutes) |
| "Frame the waterfall" | Tall cascade | Mist at the base | Park on the lower platform, slightly right |
| "Snap the watchtower" | Wooden watchtower | Eagle silhouette | Wait for the eagle flight pattern, then shoot |
| "Catch the Daredevil airborne" | Black Daredevil | Full vehicle silhouette against sky | Use the boost ramp west of the tower |
Island 4 is the hardest Tourist set because the framing elements include wildlife and lighting conditions that depend on the in-game clock. The canyon arch prompt in particular fails around 40% of attempts on the first try because the sun flare only lines up for a four-second window. Plan a run that includes the arch, waterfall, and watchtower in sequence, since they are clustered in the northwest quadrant of the island.
Vehicle Choice and Loadout for Photo Runs
The Tourist challenge is vehicle-agnostic on paper, but the framing meter responds to vehicle height, wheelbase, and camera distance. Players report noticeably higher first-try success rates when they swap off Speeders and Titans for mid-size Versatiles with a long wheelbase.
Recommended Vehicle Classes for Tourist Runs
| Vehicle Class | Why It Works | Where It Struggles | Best For |
|---|---|---|---|
| Versatile (long wheelbase) | Stable camera, mid-height hood | Slower in tight parking spots | Most Island 1 and 2 prompts |
| Drifter (mid-size) | Smooth slides into position, low hood | Camera shakes during drift chains | Island 3 prompts near drift zones |
| Titan (high hood) | High viewpoint helps elevated shots | Blocks low foreground framing elements | Island 4 elevated viewpoints |
| Speeder (low, short) | Quick repositioning | Camera too low for most framing | Not recommended |
A well-tuned Versatile is the safest all-rounder. If you only have one Drifter unlocked, swap to it for Island 3 specifically. Avoid Speeders for Tourist work — the camera sits too low and most framing elements expect the hood to clear the lower third of the frame.
Stacking Tourist Completions With Other Events
The fastest Career progression path uses Tourist completions as a feeder into Rush Squad unlocks, then pivots to Elimination and Time Attack for coin farming. Here is the step-by-step chain that experienced players follow on each island, drawn from community reports of fast completion times.
Per-Island Activity Loop
| Step | Activity | Approximate Time | Output |
|---|---|---|---|
| 1 | Clear all Tourist prompts | 8 to 12 minutes | Island completion % boost |
| 2 | Run Find the Flame speed trials | 5 to 8 minutes | Mid-tier coin + completion % |
| 3 | Knock out 2 to 3 Delivery Stunts | 6 to 10 minutes | Vehicle unlocks |
| 4 | Hit Drift Master gold runs | 10 to 15 minutes | Largest coin payout |
| 5 | Enter Career events for Rush Squad unlocks | 15 to 20 minutes | Rush Master access |
The Tourist step is the fastest way to bump island completion % because each completion adds 2 to 4% depending on the island. By the time you finish all four Tourist sets, you will have roughly 12 to 16% completion across the archipelago before touching a single Career event, and that is enough to skip the first wave of Rush Squad head-to-head requirements.
When Elimination and Time Attack Make More Sense
The HOT WHEELS Infinite Rush elimination tips that experienced players share generally recommend Elimination for mid-tier coin farming once your Speeder is upgraded to Tier 3. The laps are short, the AI is predictable, and a top-3 finish pays out more than a Tourist completion. HOT WHEELS Infinite Rush time attack tips follow a similar pattern: solo Time Attack runs are the cleanest way to push a gold time once you have the line memorized, and the coin payout is the second-highest in the game behind Drift Master. Use Tourist to clear gates, then switch to Elimination and Time Attack for income.
Common Framing Mistakes and How to Fix Them
The framing meter is the single biggest reason players fail Tourist challenges. The meter does not just check whether the target is on screen — it also evaluates the optional framing element, which is usually described in the prompt as a hint but is not always obvious.
Top 5 Framing Failures
| Mistake | Why It Fails | Fix |
|---|---|---|
| Target is in frame but framing element is not | Meter caps at 60% without the optional element | Re-read the prompt hint, look for a second object |
| Shot taken too close | Foreground element clips the target | Back up 15 to 20 meters, re-frame |
| Shot taken at wrong time of day | Lighting-dependent prompt (volcano, arch) | Wait for the in-game time window |
| Car hood blocks 30%+ of the frame | Camera height too low | Swap to a Versatile or Titan |
| Moving too fast when shutter fires | Motion blur drops meter to 40 to 50% | Stop fully before pressing shutter |
If the meter stalls below 80%, the issue is almost always a missing framing element. Pull back, re-read the prompt, and look for a secondary subject the game is asking you to include.
Time Pressure Without Burning the Timer
The Tourist timer starts the moment you accept the prompt, not when you reach the waypoint. That means the 90 to 120 second window includes your drive time. If the waypoint is more than 60 seconds away by the fastest route, skip the obvious path and cut through alleys, off-road shortcuts, or boost ramps. Most island maps have a 20 to 30% faster line that newer players miss.
Frequently Asked Questions
What is the HOT WHEELS Infinite Rush photo challenge, and is it worth doing?
The Tourist photo challenge is a free-roam activity where you drive to a marked location, position the camera, and capture a target plus a required framing element before the timer expires. It is worth doing because each completion adds 2 to 4% to the island's completion percentage, which feeds directly into Rush Squad unlocks, and a full Tourist set can be cleared in under 12 minutes per island.
How does the Tourist challenge fit into all HOT WHEELS Infinite Rush game modes?
The Tourist challenge is not a race mode. It is one of the free-roam activities (alongside Daredevil, Delivery Stunt, Stuntman, and Find the Flame) that exists outside the six core race modes (Quick Race, Elimination, Waypoints, Smashing Wheels, Time Attack, and Drift Master). It is the lowest-skill-ceiling activity, but it is the fastest to complete and the most efficient for pushing island completion percentage.
What is the best mode for coins in HOT WHEELS Infinite Rush?
Drift Master is the best mode for raw coin income, with skilled players pulling 1,400 to 2,200 coins per minute on gold drift chains. Time Attack on a gold time is the second-best at 1,100 to 1,600 coins per minute, and Smashing Wheels with a Titan rounds out the top three. Tourist challenges are a distant sixth in coin income, but they are the fastest way to unlock Rush Squad head-to-heads, which is where the high-tier vehicle rewards sit.
Do HOT WHEELS Infinite Rush elimination tips apply to Tourist runs?
Some of them do. The same boost management and cornering lines that win Elimination lobbies also work for Tourist runs, especially when you need to cut across the map quickly. The framing meter behaves better when the car is stationary, so use Elimination-style lines to reach the waypoint, then brake to a full stop before hitting the shutter.
What are the most important HOT WHEELS Infinite Rush time attack tips for Tourist prep?
Memorize the boost-ramp locations on each island, because Tourist waypoints are often positioned near the same ramps that Time Attack gold lines use. Knowing where the ramps are lets you reach Tourist waypoints in 20 to 30% less time, which is the difference between a clean first-try photo and a timer burn.