
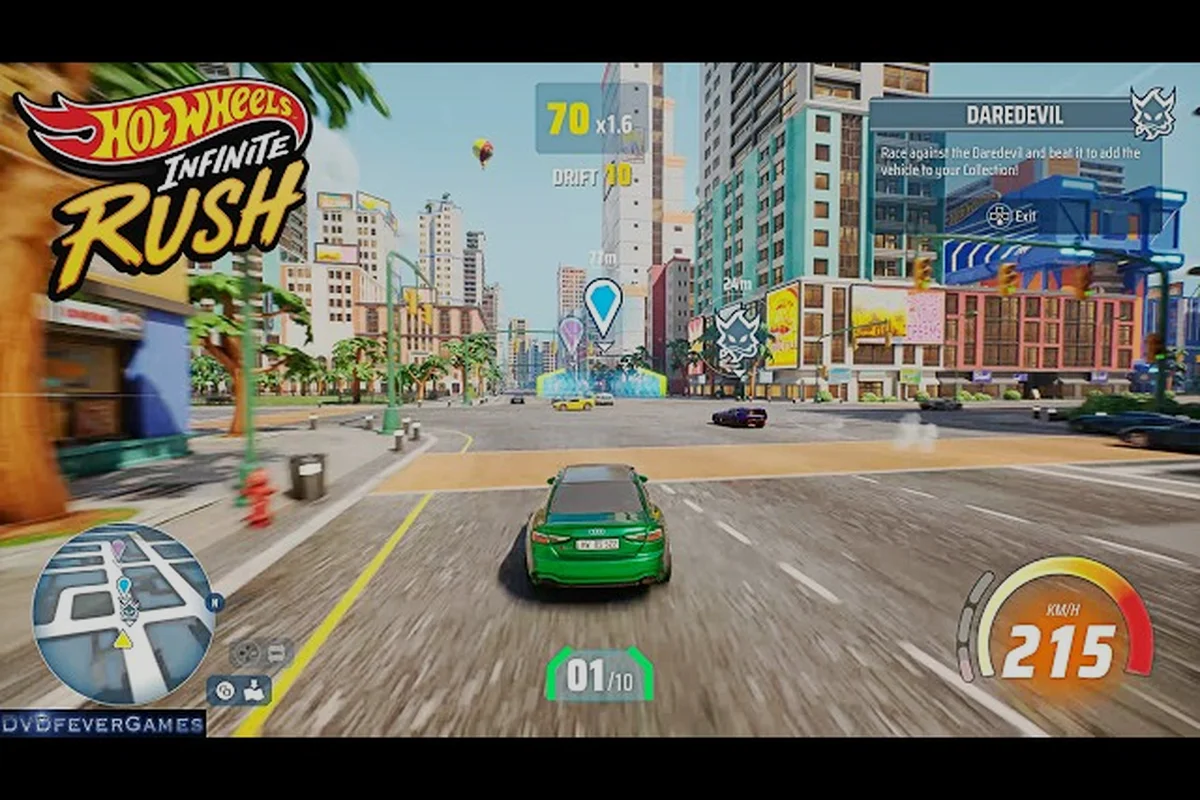
The HOT WHEELS Infinite Rush quick race mode is the gateway into a stacked six-mode arcade lineup, and knowing how each format scores, fails, and rewards you changes the way every session feels. Most players hammer the Quick Race button and never touch the rest, but the headline event list also includes Elimination Mode, Smashing Wheels, Time Attack, and Drift Master Mode, all sitting alongside Quick Race as core competitive events. Layered on top are free-roam challenges like the Delivery Stunt and the Tourist Challenge, which turn the open world into its own event calendar. Picking the right mode for the right goal — coins, vehicle unlocks, perk farming, or pure lap-time bragging rights — is the difference between aimless driving and a clean progression loop.
The Six Core Race Modes at a Glance
HOT WHEELS Infinite Rush ships with six structured event types according to the official Milestone game page: Quick Race, Elimination, Waypoints, Smashing Wheels, Time Attack, and Drift Master. Each one feeds a different part of the Rush Squad progression system, and each one punishes a different habit — corner-cutting in Quick Race, hanging back in Elimination, going easy on the boost in Time Attack. Below is a snapshot of how the six modes compare on objective, scoring, and reward focus.
| Mode | Primary Objective | Lose Condition | Reward Focus |
|---|---|---|---|
| Quick Race | Finish first across 1–3 laps | Finish last in lobby | XP + coins, fastest lap bragging rights |
| Elimination Mode | Last car standing after periodic cuts | Placed last at cut interval | Bonus XP for survival round |
| Waypoints | Hit markers in order, fastest total time | Miss a waypoint or run out of time | Coins per waypoint cleared |
| Smashing Wheels | Tally destruction points on props | Run out of time | Coins + Stuntman progression |
| Time Attack | Set a personal best lap or course time | Run out of time | Leaderboard placement + coins |
| Drift Master Mode | Chain drifts to build combo score | Drop below score threshold | Drift perks + visual cosmetics |
Quick Race is where most drivers cut their teeth, but Elimination Mode is where the lobby separates casuals from racers. The key difference is rhythm: in a Quick Race, one bad lap still leaves you a chance; in an Elimination event, the worst-placed car is removed at fixed intervals, so every corner matters from turn one.
Why Quick Race Is the Default Starting Point
The HOT WHEELS Infinite Rush quick race mode drops you into a standard 1–3 lap contest against a full grid. Because the format is the most forgiving, it is the recommended training ground for new Rush Squad members and the fastest path to consistent coin income during the first two islands. The mode also exposes every core mechanic — boost management, strafe dodges, perk timing, and shortcut awareness — without the added pressure of a shrinking grid or a hard clock. According to Nintendo Everything's coverage of the four-island reveal, Quick Race events are tied to the early progression track and scale in difficulty as you move through each island, so a driver who dominates Quick Race on Island 1 is ready to test Elimination Mode by Island 2.
Elimination Mode: Survival Racing With Real Stakes
The HOT WHEELS Infinite Rush elimination mode takes the Quick Race format and adds a ticking clock of cuts. At set intervals — typically every 30 to 45 seconds depending on the track — the last-placed car is removed from the race, and the grid shrinks until only three drivers remain for the final showdown lap. This format rewards aggressive, early-position racing and punishes passive driving. Sitting in fifth place feels safe for the first two cuts, but the lobby compresses fast, and a single bad corner in the final third can knock you out before the finish line.
| Event Length | Cut Interval | Final Grid | Recommended Strategy |
|---|---|---|---|
| Short (2 laps) | ~30 sec | 3 cars | Push top-3 by lap 1, defend |
| Medium (3 laps) | ~40 sec | 3 cars | Hold P4, capitalize on mistakes |
| Long (4+ laps) | ~45 sec | 3 cars | Save boost for the final two cuts |
Because every cut removes exactly one driver, your position relative to the car directly behind you matters more than your gap to the leader. Players who chase the front pack early often overboost and end up in the wrong half of the grid when the next cut hits. According to community testing, the optimal Elimination strategy is to lock into the top half of the lobby by the end of lap one, then spend the rest of the race defending with controlled strafe rather than chasing risky overtakes.
Drift Master Mode: Score-Based Precision
The HOT WHEELS Infinite Rush drift master mode swaps position-based racing for chained score accumulation. Every drift adds to a combo meter, and breaking the chain — by hitting a wall, going off-track, or straight-lining for too long — resets the multiplier. Higher-tier Drift Master events introduce score thresholds that must be reached before the timer expires, meaning that a driver who can pull long, clean drifts through multi-corner sequences will outscore a driver who can only do short, snappy slides. The mode ties directly into the perk system mentioned in the Beyond the Track Episode 2 developer blog, where drift performance influences which perks and visual effects you can equip.
| Drift Tier | Angle Required | Score Multiplier | Common Track Location |
|---|---|---|---|
| Mini Drift | 15°+ | x1.0 | Short chicanes |
| Standard Drift | 30°+ | x1.5 | Sweeping corners |
| Long Drift | 45°+ held for 2 sec | x2.0 | Multi-apex sections |
| Chain Drift | Continuous drift over 5 sec | x3.0+ | Highway curves |
The Drifting skill in Drift Master Mode is less about raw speed and more about reading the next corner while still finishing the current one. New players tend to panic-strafe at the end of a drift to recover; experienced players learn to "feather" the throttle so the rear tires stay loaded through the transition.
Smashing Wheels and Time Attack: Two Sides of the Same Grind
The HOT WHEELS Infinite Rush smashing wheels mode and the HOT WHEELS Infinite Rush time attack mode look like polar opposites on paper, but they share a common purpose: clean, repeatable runs for coin and XP farming. Smashing Wheels is a destruction tally event — you drive a designated course and score points for every prop you obliterate, with multipliers for combo chains (stack two crashes in a row without touching the brakes for a bonus). Time Attack is a stripped-down solo format: no other cars, no boosts from rivals, just you, the clock, and the track.
| Attribute | Smashing Wheels | Time Attack |
|---|---|---|
| Grid Size | 1 (solo) | 1 (solo) |
| Scoring System | Points per object + combo multiplier | Time (lower is better) |
| Primary Reward | Coins + Stuntman XP | Leaderboard placement + coins |
| Risk Factor | Off-track breaks combo | One mistake costs a full second |
| Best Vehicle Type | Heavy chassis with high durability | Lightweight, high-boost vehicle |
The reason these two belong in the same section is that experienced drivers use them as complementary grind tools. Smashing Wheels builds the coin reserve needed to unlock new vehicle chassis and perk slots, while Time Attack is where you chase personal bests that unlock leaderboard-only cosmetic rewards. Players who alternate the two — one Smashing Wheels run, two Time Attack runs, repeat — report steadier coin growth than players who grind one mode exclusively, because the modes tax different parts of your driving skill.
Smashing Wheels Strategy
A common mistake in Smashing Wheels is treating the course like a race and driving wide through the props. The opposite is better: hug the inside of every corner, cut through clusters of destructible scenery, and use the strafe button to align with stacked prop groups. The combo multiplier escalates quickly, so a run that looks chaotic on the minimap is often the highest-scoring one on the scoreboard.
Time Attack Strategy
Time Attack rewards a different mindset: treat every corner as a three-part problem — entry speed, apex angle, and exit boost. The fastest community-known times on the standard Time Attack tracks shave 0.3 to 0.5 seconds per lap by sacrificing the conventional racing line in favor of "boost loops," where the driver cuts across a speed pad immediately after exit, sending them into the next straight at maximum velocity. If you want a deeper breakdown of how boost sections connect across the islands, the Find the Flame speed challenge guide maps out where the major boost loops are.
Free-Roam Events: Delivery Stunt and Tourist Challenge
Outside the six structured race modes, HOT WHEELS Infinite Rush layers free-roam events on top of every island. Two of the most distinctive are the Delivery Stunt and the Tourist Challenge, both of which trade racing-line precision for a different kind of driving discipline. The HOT WHEELS Infinite Rush delivery stunt task gives you a specific vehicle, a destination pin, and a damage meter; every collision eats into that meter, and running out of damage ends the delivery prematurely. Success rewards you the vehicle outright, which makes Delivery Stunt one of the better event-to-unlock pipelines in the game.
| Event | Primary Goal | Lose Condition | Reward |
|---|---|---|---|
| Delivery Stunt | Drive assigned vehicle to destination with minimal damage | Damage meter empty on arrival | Vehicle unlocked |
| Tourist Challenge | Photograph specific targets with correct framing | Missed prompts or wrong angle | Coins + photo album completion |
| Daredevil | Win a one-on-one race against a special vehicle | Lose the race | Daredevil vehicle added to Garage |
| Find the Flame | Reach a destination with no set route | Run out of time | Coins + fast-travel unlock |
| Stuntman | Smash as many objects as possible | Timer expires | Coins + Stuntman XP |
The HOT WHEELS Infinite Rush tourist challenge is the photographic counterpart to the Delivery Stunt. Instead of driving carefully, you are asked to frame specific subjects in the in-game photo mode — landmarks, vehicles, environmental features — using framing prompts that tell you what angle, distance, and subject matter the shot needs. A Tourist challenge completed cleanly fills a slot in the photo album, which is one of the few long-term collection tracks in the game.
Why Free-Roam Events Matter for Progression
Quick Race and Elimination are great for raw skill growth, but the Rush Squad progression system also gates new islands and new perk slots behind free-roam completion milestones. Skipping Delivery Stunts and Tourist Challenges is a fast way to hit a progression wall in the late game, because the easiest coin sources and the cleanest vehicle-unlock paths both come from free-roam events. The Daredevil system, which spawns special vehicles in traffic for one-on-one races, is the most efficient way to expand the Garage, and the Daredevil guide walks through how to spot, engage, and defeat them.
Building a Session Around the Right Event
Knowing the modes is one thing; sequencing them inside a single play session is where most drivers leave coins on the table. A clean 30-minute session typically cycles through three event types: one race mode for XP, one grind mode for coins, and one free-roam event for vehicle unlocks. Below is a sample session plan that experienced players report using during the mid-game Island 2 to Island 3 transition.
| Block | Duration | Event Type | Goal |
|---|---|---|---|
| Warm-up | 5 min | HOT WHEELS Infinite Rush quick race mode | Sharpen reflexes, average 1st–3rd place finishes |
| Coin Grind | 10 min | Smashing Wheels or Time Attack | Push coin total toward next vehicle unlock |
| Progression Push | 10 min | Elimination Mode or Drift Master | Test skill under pressure, fill perk XP |
| Free-Roam Close | 5 min | Delivery Stunt or Tourist Challenge | Unlock next Garage vehicle or photo slot |
The warm-up block is the one most players skip, and it is the one that makes the biggest difference in the rest of the session. Starting cold in Elimination Mode or Drift Master is a recipe for early elimination and a wasted time investment, because the first two minutes of those modes are where the worst habits show up. A driver who has already burned through three Quick Race laps before entering Elimination is, in community testing, more likely to survive the first two cuts and reach a placing worth XP.
When to Break the Routine
The session plan above is a default, not a rule. There are three situations where experienced players break the cycle: (1) when a leaderboard event is live and bonus rewards double the coin payout, (2) when a Daredevil vehicle they want is spawning on the current island, and (3) when a specific Rush Master challenge unlocks. In those cases, the session should pivot to the time-sensitive event, and the rotation can resume on the next login.
Frequently Asked Questions
What is the difference between Quick Race and Elimination Mode in HOT WHEELS Infinite Rush?
Quick Race is a standard 1–3 lap race where every driver finishes, and the only goal is to place as high as possible for XP and coins. Elimination Mode removes the last-placed car at fixed intervals until only three remain, so survival matters more than outright speed. Most players use Quick Race to warm up before jumping into Elimination lobbies.
How does Drift Master Mode scoring work?
Every drift adds to a combo meter, and the meter multiplies the longer you hold a continuous drift. Breaking the chain by hitting a wall, going off-track, or straight-lining resets the multiplier. The goal is to chain long drifts through multi-apex corners and reach the score threshold before the timer expires.
What is the best mode for farming coins?
Players report that Smashing Wheels delivers the most consistent coin yield because combo multipliers stack quickly and every run has a short reset loop. Time Attack is a close second when leaderboard placement bonuses are active. Quick Race is reliable but pays less per minute on average.
What is a Delivery Stunt and how do I succeed?
A Delivery Stunt gives you a specific vehicle and a destination pin, with a damage meter that depletes on every collision. Drive smoothly, brake early, and avoid traffic to reach the destination with damage remaining. Successful completion unlocks the vehicle outright, which is why Delivery Stunts are a primary vehicle-unlock path.
How do I complete a Tourist Challenge photo?
Read the framing prompt carefully — it specifies the subject, the angle, and the distance. Use the in-game photo mode to align the camera, and confirm the shot when the framing indicator turns green. A clean Tourist Challenge completion adds a page to the photo album and pays out coins, with bonus rewards for full album sets.